How to Publish your Android app on the Google Play Store and Avoid Rejection

Some time ago, we released a blog post about how to submit your app to the App store. This time we’re looking at Android apps, and how you can easily submit them to the Google Play Store. Have you just finished working on an app? Ready to release it into the world? Exciting times! The eight-step guide below shows you all you need to know about publication.
1. Set yourself up on Google Developer
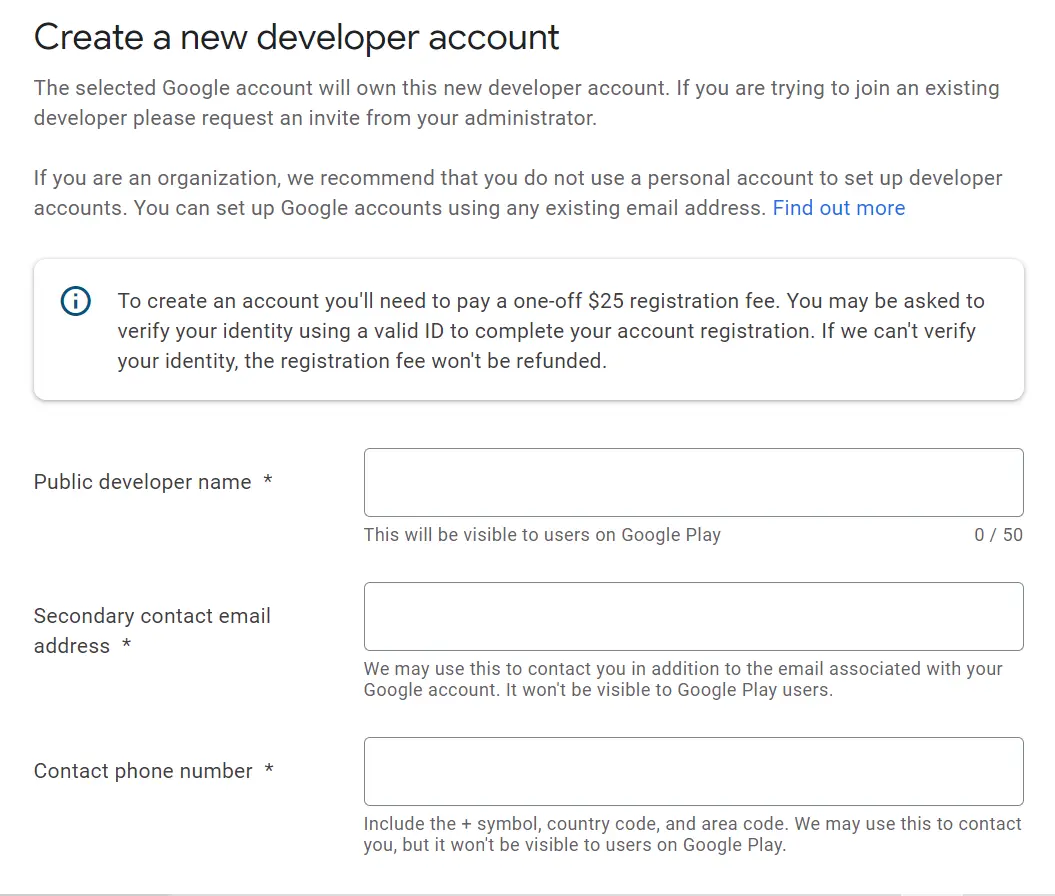
Registering a Google Developer account is essential when it comes to publishing your app. You can sign up specifically for a Google Developer account, or you can use any of your existing Google accounts. Note that you’ll be asked to sign the Google Play Developer distribution agreement, fill in some basic details and pay the registration fee ($25). It’s all a straightforward process. You’ll have to be at least 18 years old to set up an account.
2. Add a Google Payments Merchant account (for apps with in-app purchases)
If you’re creating an app with in-app purchases, you’ll have to create a Google Merchant account. This will be helpful in managing your app sales, and you’ll be able to view full sales reports to enable you to track performance. Merchant Center helps you to ensure that your product info, like price and availability, is correct when shown to potential customers on Google.
Here’s what you need to do:
1. Access your Payments settings page, which you can view by going to ‘Settings’ and then ‘Developer Account.’
2. Click on ‘Create payments profile’. Here you’ll need to fill in all your business information, including the legal name of your business as you want it to appear on your payments profile. You’ll also need to provide your legal business address, the name of your primary contact and other outstanding business information:
- Your website
- The category of the products that you sell
- Your customer support email
- The business or product name that will appear on your customers’ credit card statements.
When you’ve finished, remember to click ‘submit’.
3. Make sure that you’re aligned with the Google Developer Policies
It’s worth studying the Google Developer policies in detail. Why are they important to get to know? Well, quite simply, if your product does not comply with these regulations, it is likely to be rejected from the Store, which is precisely what you’re looking to avoid. Note that these policies are constantly updated to reflect changes in the law, so it’s useful to stay on top of them even after your app is launched.
The topics covered include:
- Restricted content
- Impersonation
- Intellectual property rights
- Privacy, deception and device abuse
- Monetization and Ads
- Store listing and promotion
4. Upload your app to the Google Console
Now that you have the preliminary admin out of the way, the excitement begins! Here are the steps that you should go through in your Developer account:
- Go to the ‘All Apps’ tab and select ‘Create app.’
- Type in the ‘App Name’
- Select the default language for your app
- Select whether it’s an ‘App or Game’
- Select whether it’s ‘Free or Paid’
- Click on ‘Create app’
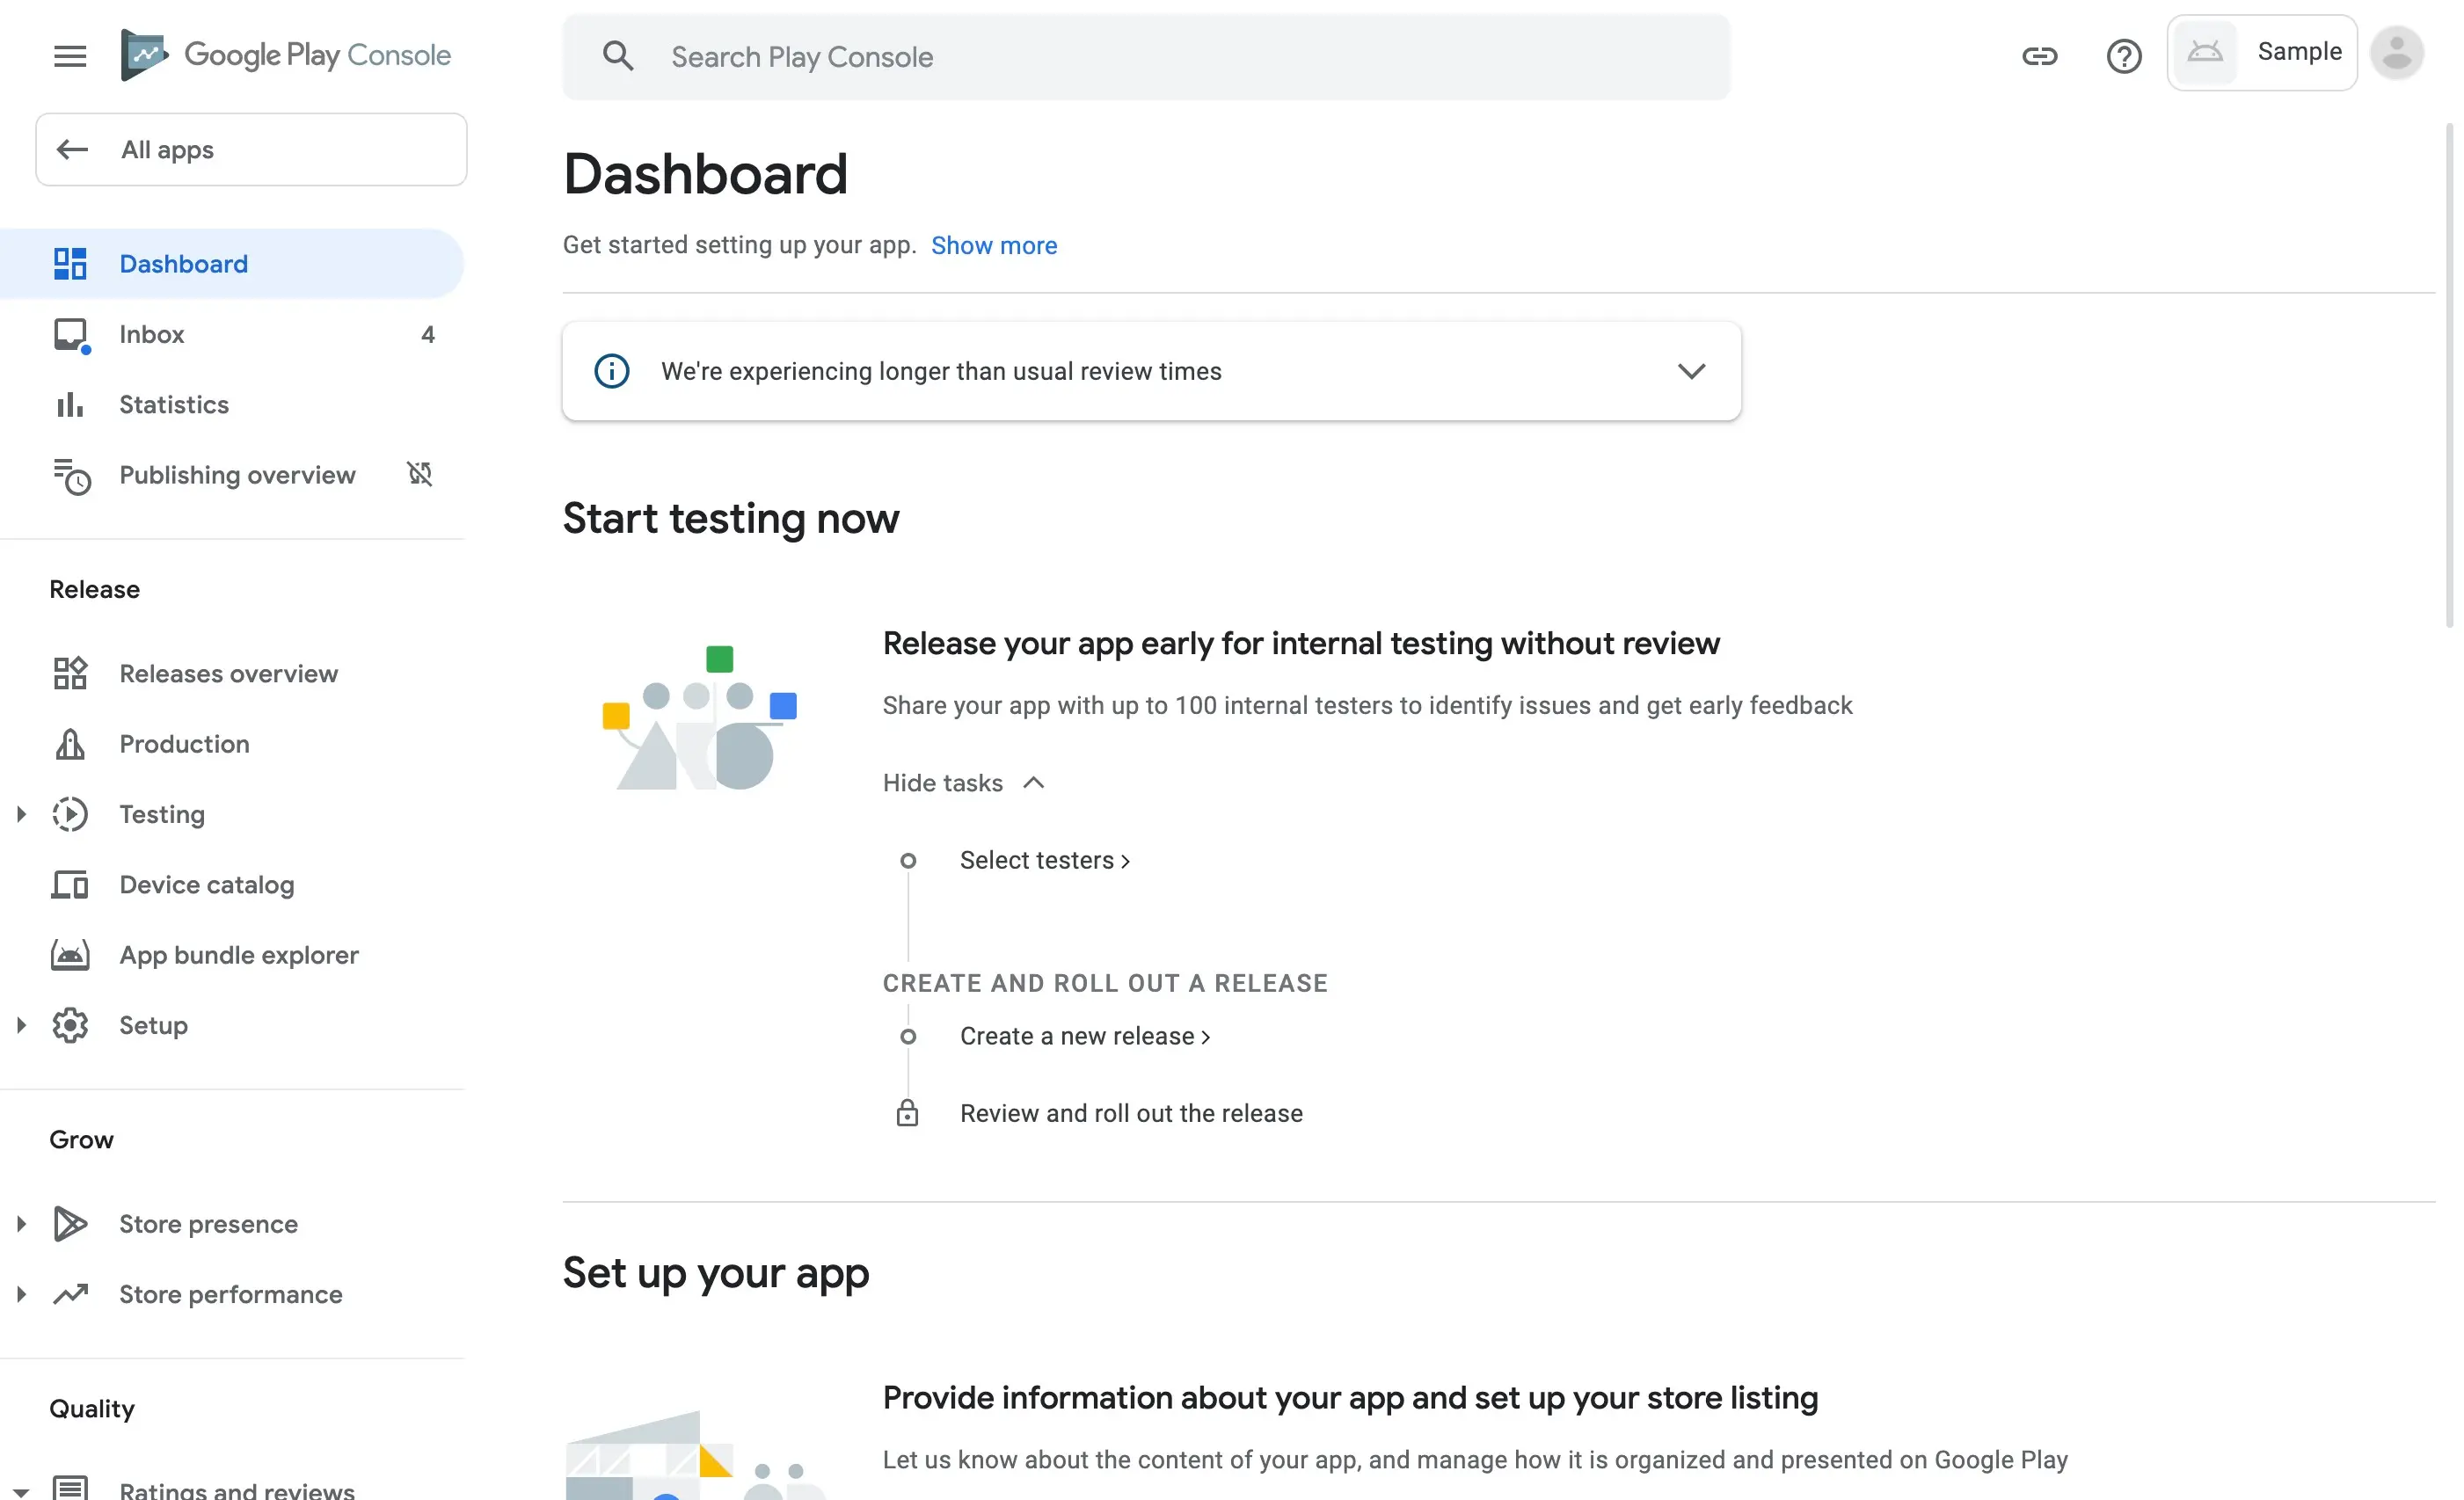
After creating the application, you will be transferred to the Dashboard, where there are recommendations for further actions, these are:
- Release your app early for internal testing without review
- Provide information about your app and set up your store listing
- Test your app with a larger group of testers that you control
- Let anyone sign up to test your app on Google Play
- Build excitement for your app with pre-registration
- Publish your app on Google Play.
The next step is to go into the ‘Store Listing’ which can be found in the ‘Grow’ section on the left hand panel. You’ll need to click on ‘Store presence’ and then ‘Main store listing.’
This area contains all the important details needed for App Store Optimization (ASO). Here, you’ll also be able to change the ‘App name’ if you so wish. Take care while filling out the other sections, as this is the main place in which you’ll be able to ‘sell’ your app to users. In fact, it’s helpful to have this copy prepared in advance, and you might even choose to enlist the help of a copywriter. Here’s what you’ll need to complete:
- Short description: This should be a brief summary of what your app sets out to do. It will be featured on the app’s Google Play Store listing. Your goal here is to convince users to download, so focus on the benefits that the app will bring them and remember to include those all important keywords.
- Full description: Here you have a maximum of 4,000 characters so you’re able to go into more detail about the features of your app. This copy will be visible when a user opens your app’s store listing.
- App Icon: This will be shown in Google Play Store and phones and tablets when downloaded. It should be 512px by 512px with a max file size of 1024KB
- Feature graphic: Go with an eye-catching and simple image here which will effectively promote your brand.
- Video link: If you have a promo video you can add a YouTube link here.
In the Graphics section:
- Phone Screenshots: These are important as they show the end user what the different features of your app look like. Click ‘Add screenshot’ to start uploading.You must download a minimum of two screenshots, but it’s good to aim for seven or eight to showcase the full breadth of what your app can do. Note the requirements for uploading your screenshots: They should be in .jpg or 24-bit png (no and be between 320px and 3840 px.
- 7-inch and 10-inch tablet screenshots: If you would like your product to be featured in the Play Store’s “Designed for tablets” list, make sure that you also upload screenshots of your app on a 7-inch and 10-inch tablet.
Note that the application type (app or game) can be changed in the ‘Store settings’ (which you can find in the side menu, in the ‘Grow’ section). You must also assign categories to applications or games (e.g. ‘Beauty’ or ‘Finance’ or in the case of games, ‘Adventure,’ ‘Educational’ and ‘Racing’) and provide a contact email address.
5. Give your app a content rating
In the Policy tab under app content, you’ll be asked to answer six questions to make sure that your app complies with Google Play policies. These are:
- Privacy policy - you should add a privacy policy to show how you treat sensitive user and device data.
- Content ratings - more on this below.
- Target audience and content - You must include content about the target age group of your app, and to show whether or not it is safe for children under 13 to use.
- Ads - you must include information about whether your app contains ads. The ‘Contains ads’ label is shown next to apps with ads in Google Play.
- App access - if parts of your app are restricted based on things such as membership or login credentials, you should describe this clearly.
- News apps - You must let us know whether your app is a news app, as this helps to ensure transparency.

In the left hand menu, you’ll also find the content rating questionnaire. It’s important to answer this, because otherwise you run the risk of being marked as an unrated app and being ousted from the Store. Make sure that all of the information contained in the questionnaire is true to the best of your knowledge.
You must click on ‘Save questionnaire’ at the end and then on ‘Calculate Rating’. Finally, click on ‘Apply Rating’ to move forward to pricing.
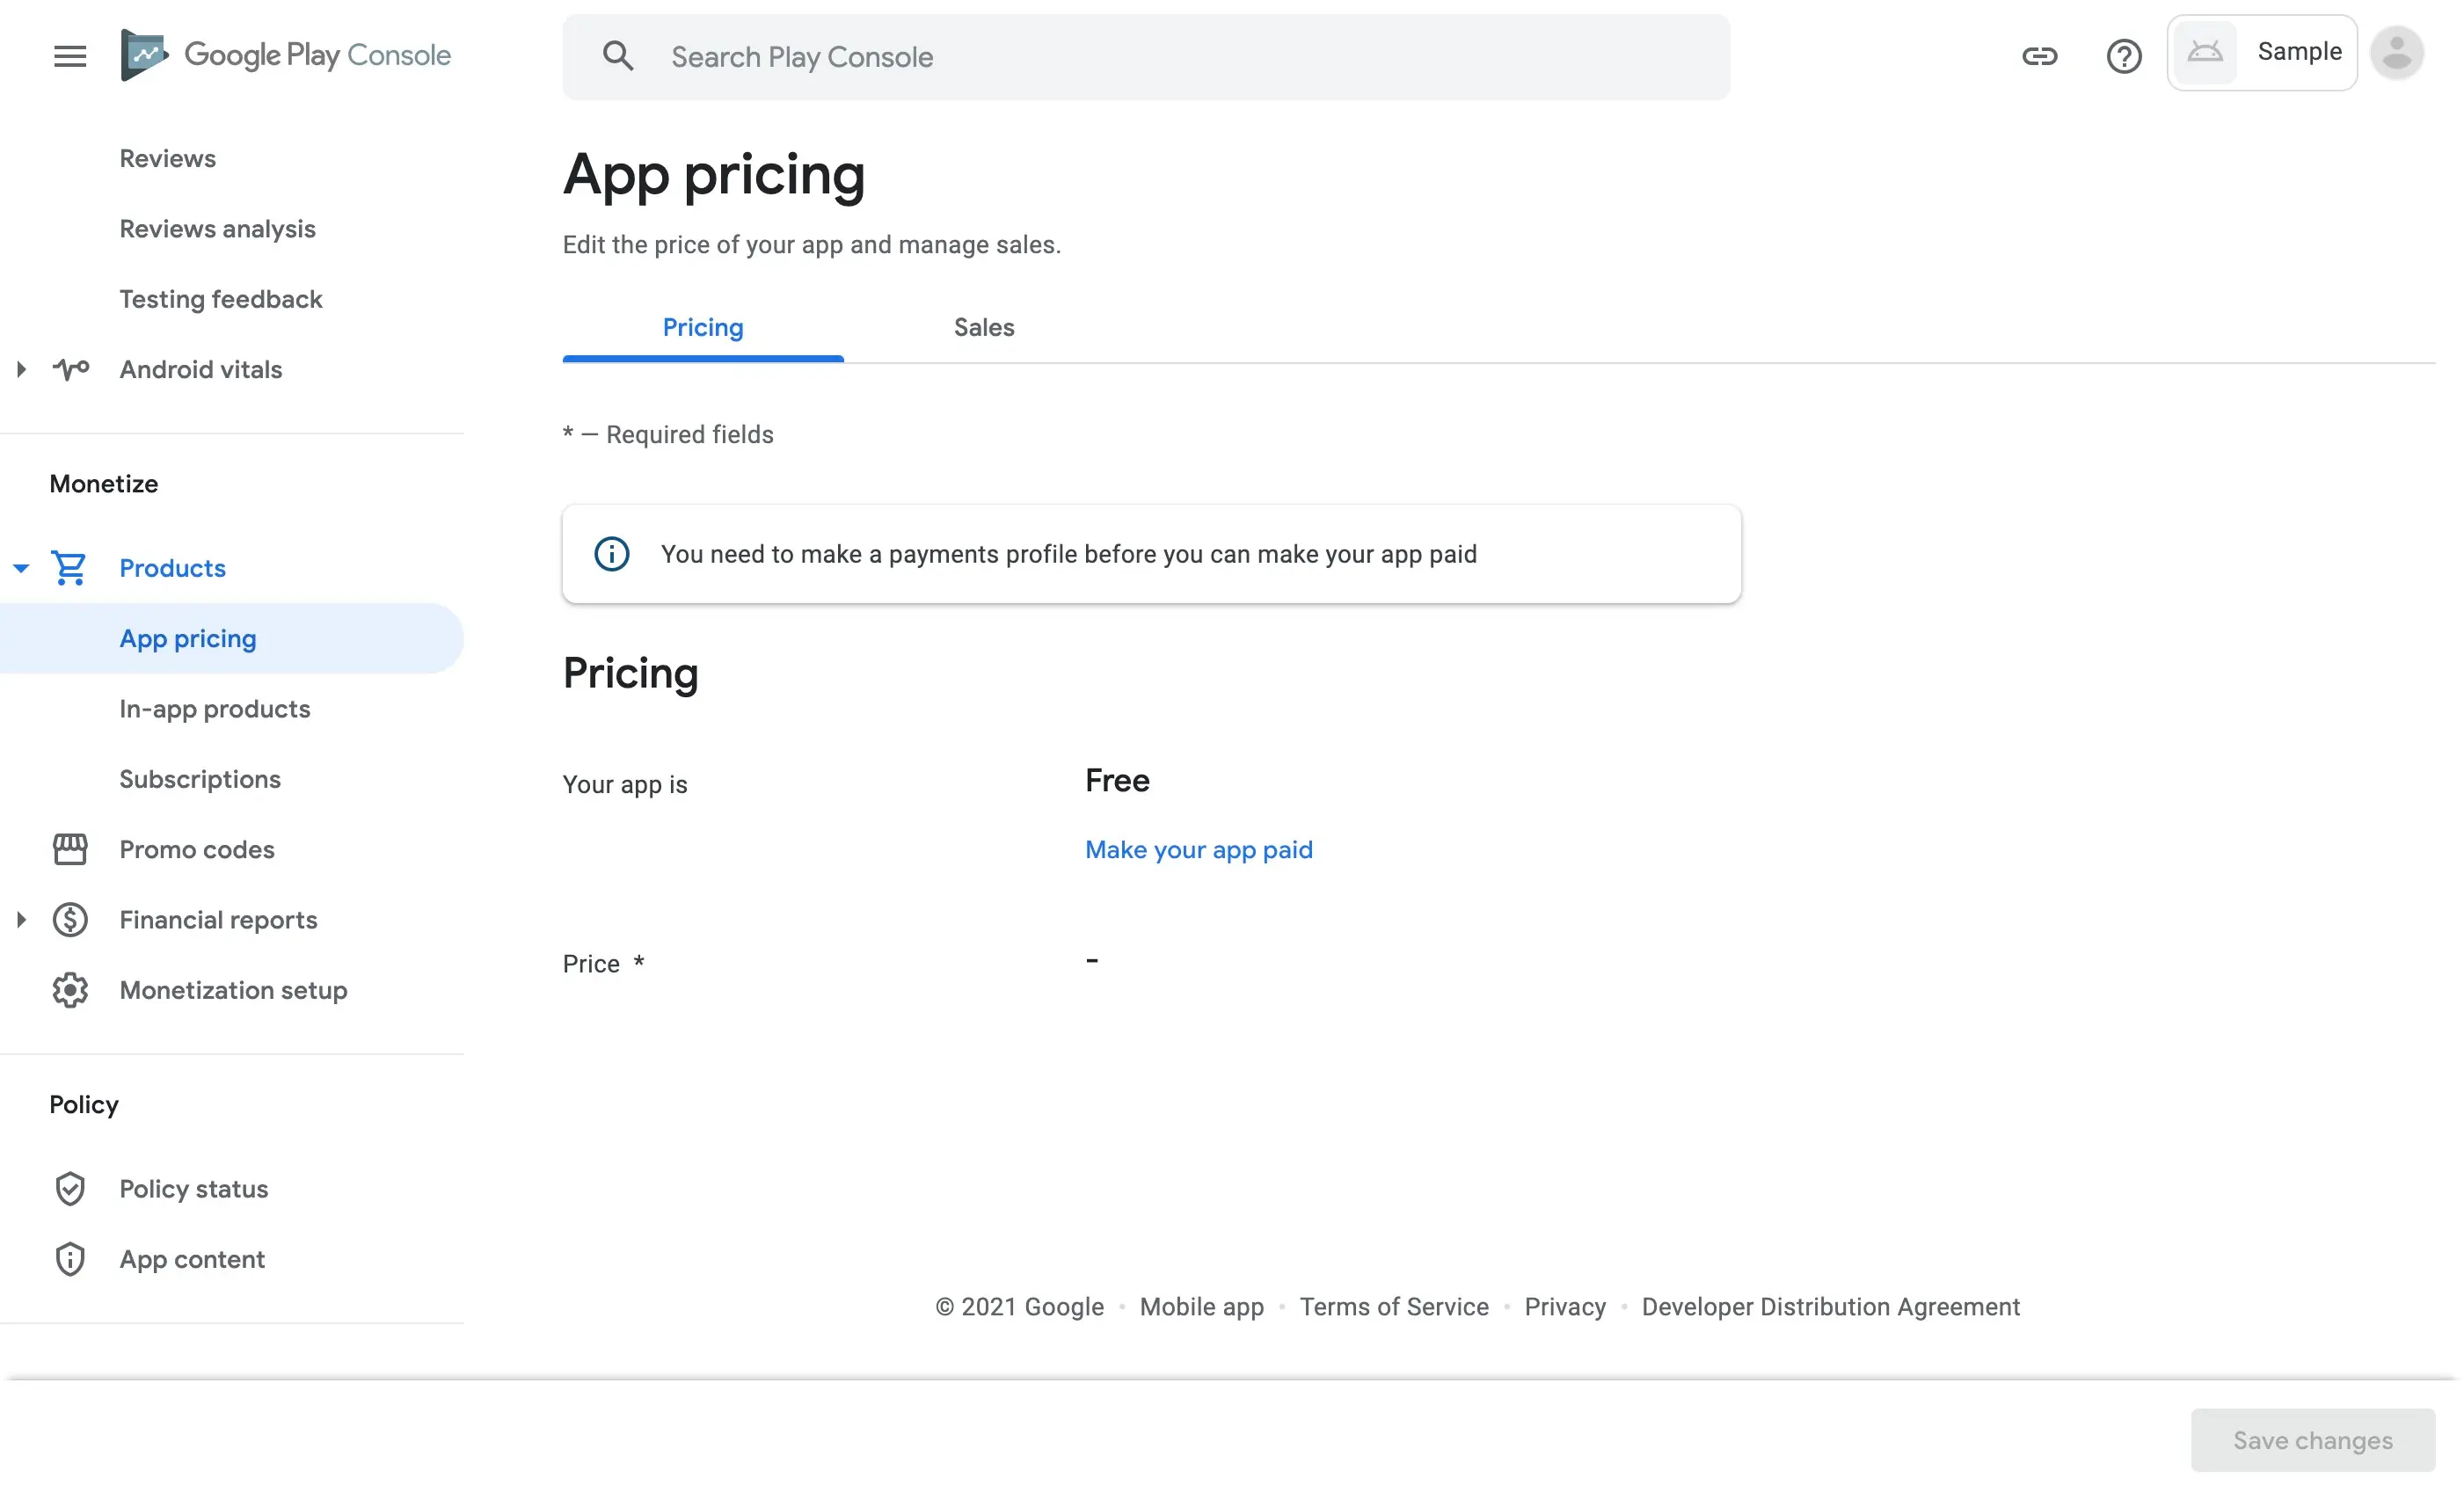
6. Price your app
In the Pricing and distribution section which you can find in the side menu under the ‘Monetize’ section after clicking on ‘Products’ and ‘App Pricing’, you’ll be asked to fill in some key facts. Here is the information you’ll need to provide:
On the Pricing tab, you’ll be asked to choose whether your app is free or paid. You’ll also be able to select a pricing template and to set the price.
On the Sales tab, you’ll be able to set any discounts or offers.
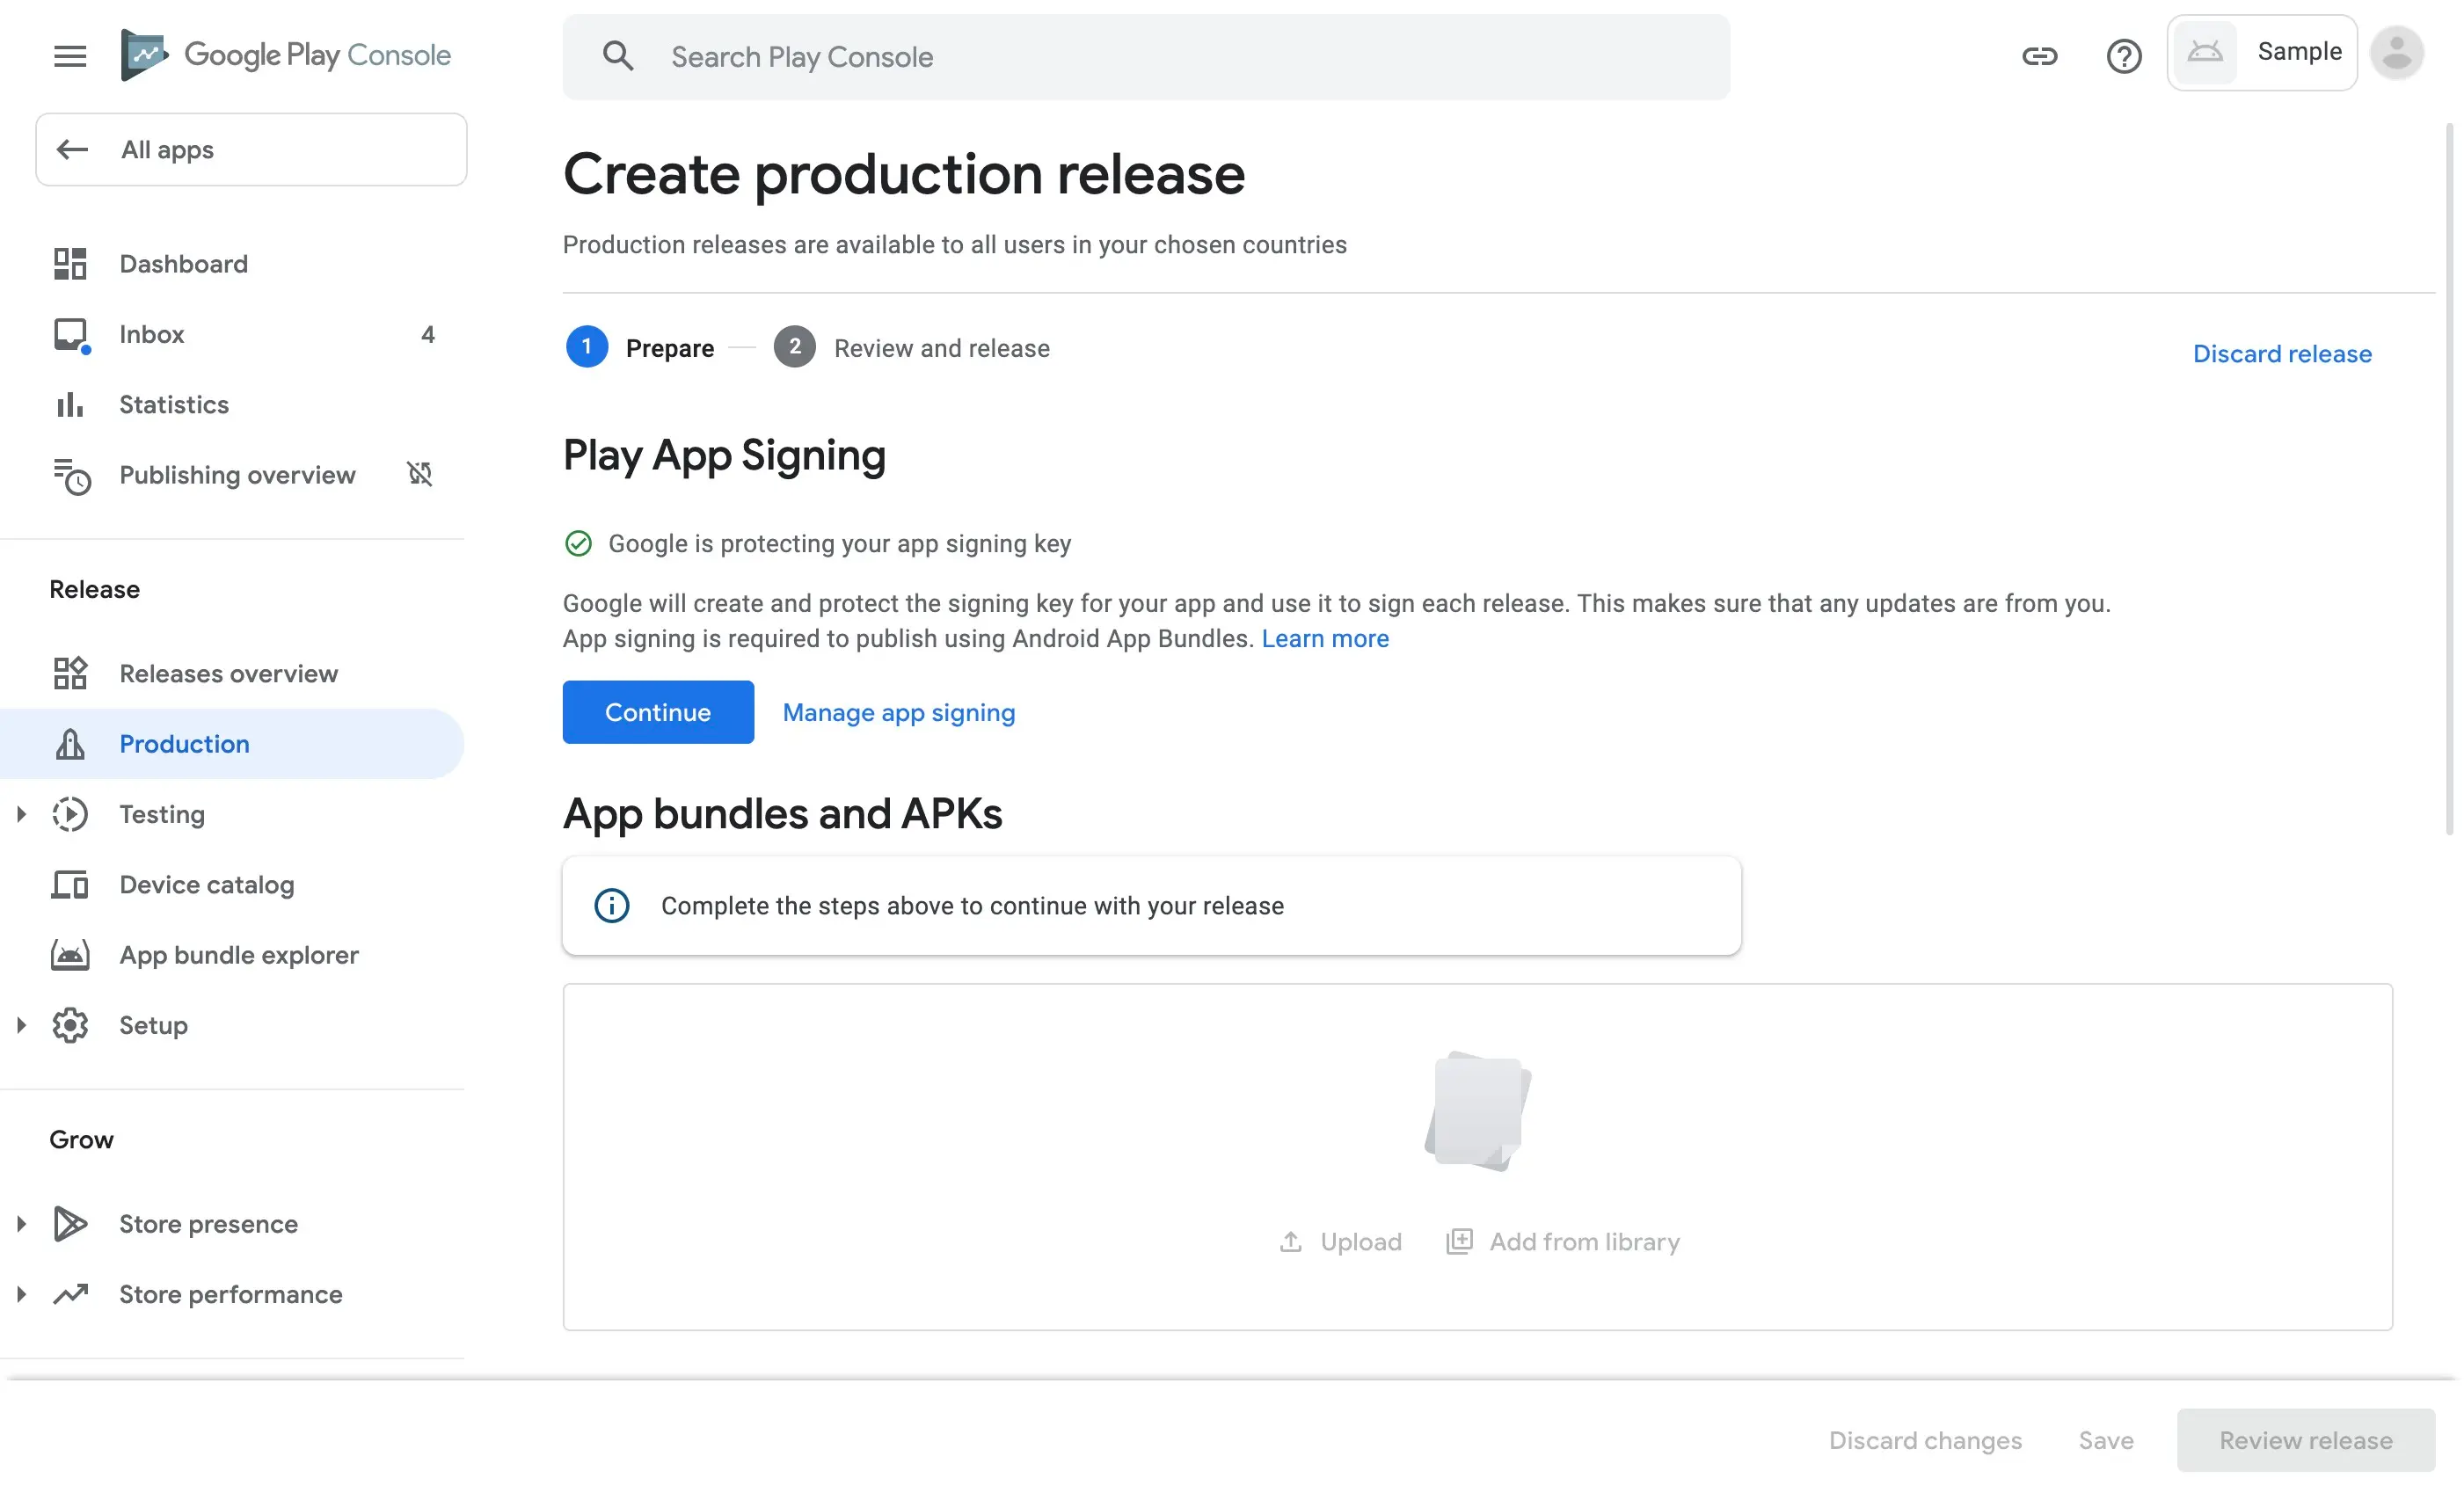
8. Upload your APK or app bundle
Now you’re ready to upload all your files before release! You’ll need to go to the side menu, click ‘Release’ and then click ‘Production.’ You’ll be able to select whether you want to release your app directly into production or to release it in beta mode, which will enable you to conduct tests and make final changes to it before the official release. Once you’ve made this choice, click on ‘Create new Release’.
- Select whether you want Google Play app signing on your app or opt out of this and sign in locally
- Select ‘Upload’
- Select your app’s APK or App Bundle files to upload.
- Write down your ‘Release name’ - this is used for future identification and isn't shown to users on Google Play.
- Finally select ‘Review release’ which will submit the app for release
It’s important to note that from August 2021, new apps will be required to publish with the Android App Bundle on Google Play.
9. Finalize the release!
Everything is now in motion to enable you to finalize your release. Here’s what you need to:
- Go to the ‘Releases Overview’ page
- Next to your chosen release, open the release details page.
- In the ‘Release overview’ section, choose ‘View release dashboard’
- Click the ‘Releases tab,’ then ‘Edit’
- Remember to review your draft release before clicking ‘Save’.
- If you see an ‘Errors Summary’ page come up, be sure to review all the details and to resolve any problems that might arise.
- When you’re ready to go, select ‘Start rollout!’
Congratulations! Your app has now been sent to Google for review. You’ll receive a notification on the Google Console Dashboard once the app has been reviewed. All being well, it should be published on the Google Play Store in two hours’ time!
In conclusion
We hope that you’ve found the above summary useful and that it’s helped to make your app submission process straightforward and smooth. We wish you all the best on your new digital project journey! May this be the start of something truly great!
Looking for an experienced team to bring your digital product to life?
Get in touch for a free consultation on hello@10Clouds.com. Our friendly team will get back to you within one working day!