How to white-label your product using Sass, JS and env variables
22.01.2021 | 4 min read


Are you creating a digital product which you want to sell to clients as a white-label offer? Want to allow them to add their own branding to it? Maybe even to pick and choose their features? If so, there are some key factors that you must consider during development.
If you’ve read any of my previous blog posts, you’ll know that I’m a great fan of learning on the job, so I wanted to walk you through the example of an app that I’ve created as a white-label solution for three example companies - Amazon, Google and Facebook. Note that this blog post is written from a developer’s perspective and will show you the process with the client in mind (the business using the white-labelled solution) rather than the end user.
What is white-labelling?
White label software is essentially software used by a company, which that company can brand as its own.
To the end user, the digital product that they access will appear as if it came from that brand. Usually white label software is sold under the software as a service (SaaS) model. The software is provided unbranded to a client. The client then adds their branding or simply removes the original branding and uses the product for their purposes. Well-known examples of white labelled software products include template-based website builders and SEO tools.
Creating a white-labelled product
What will we build?
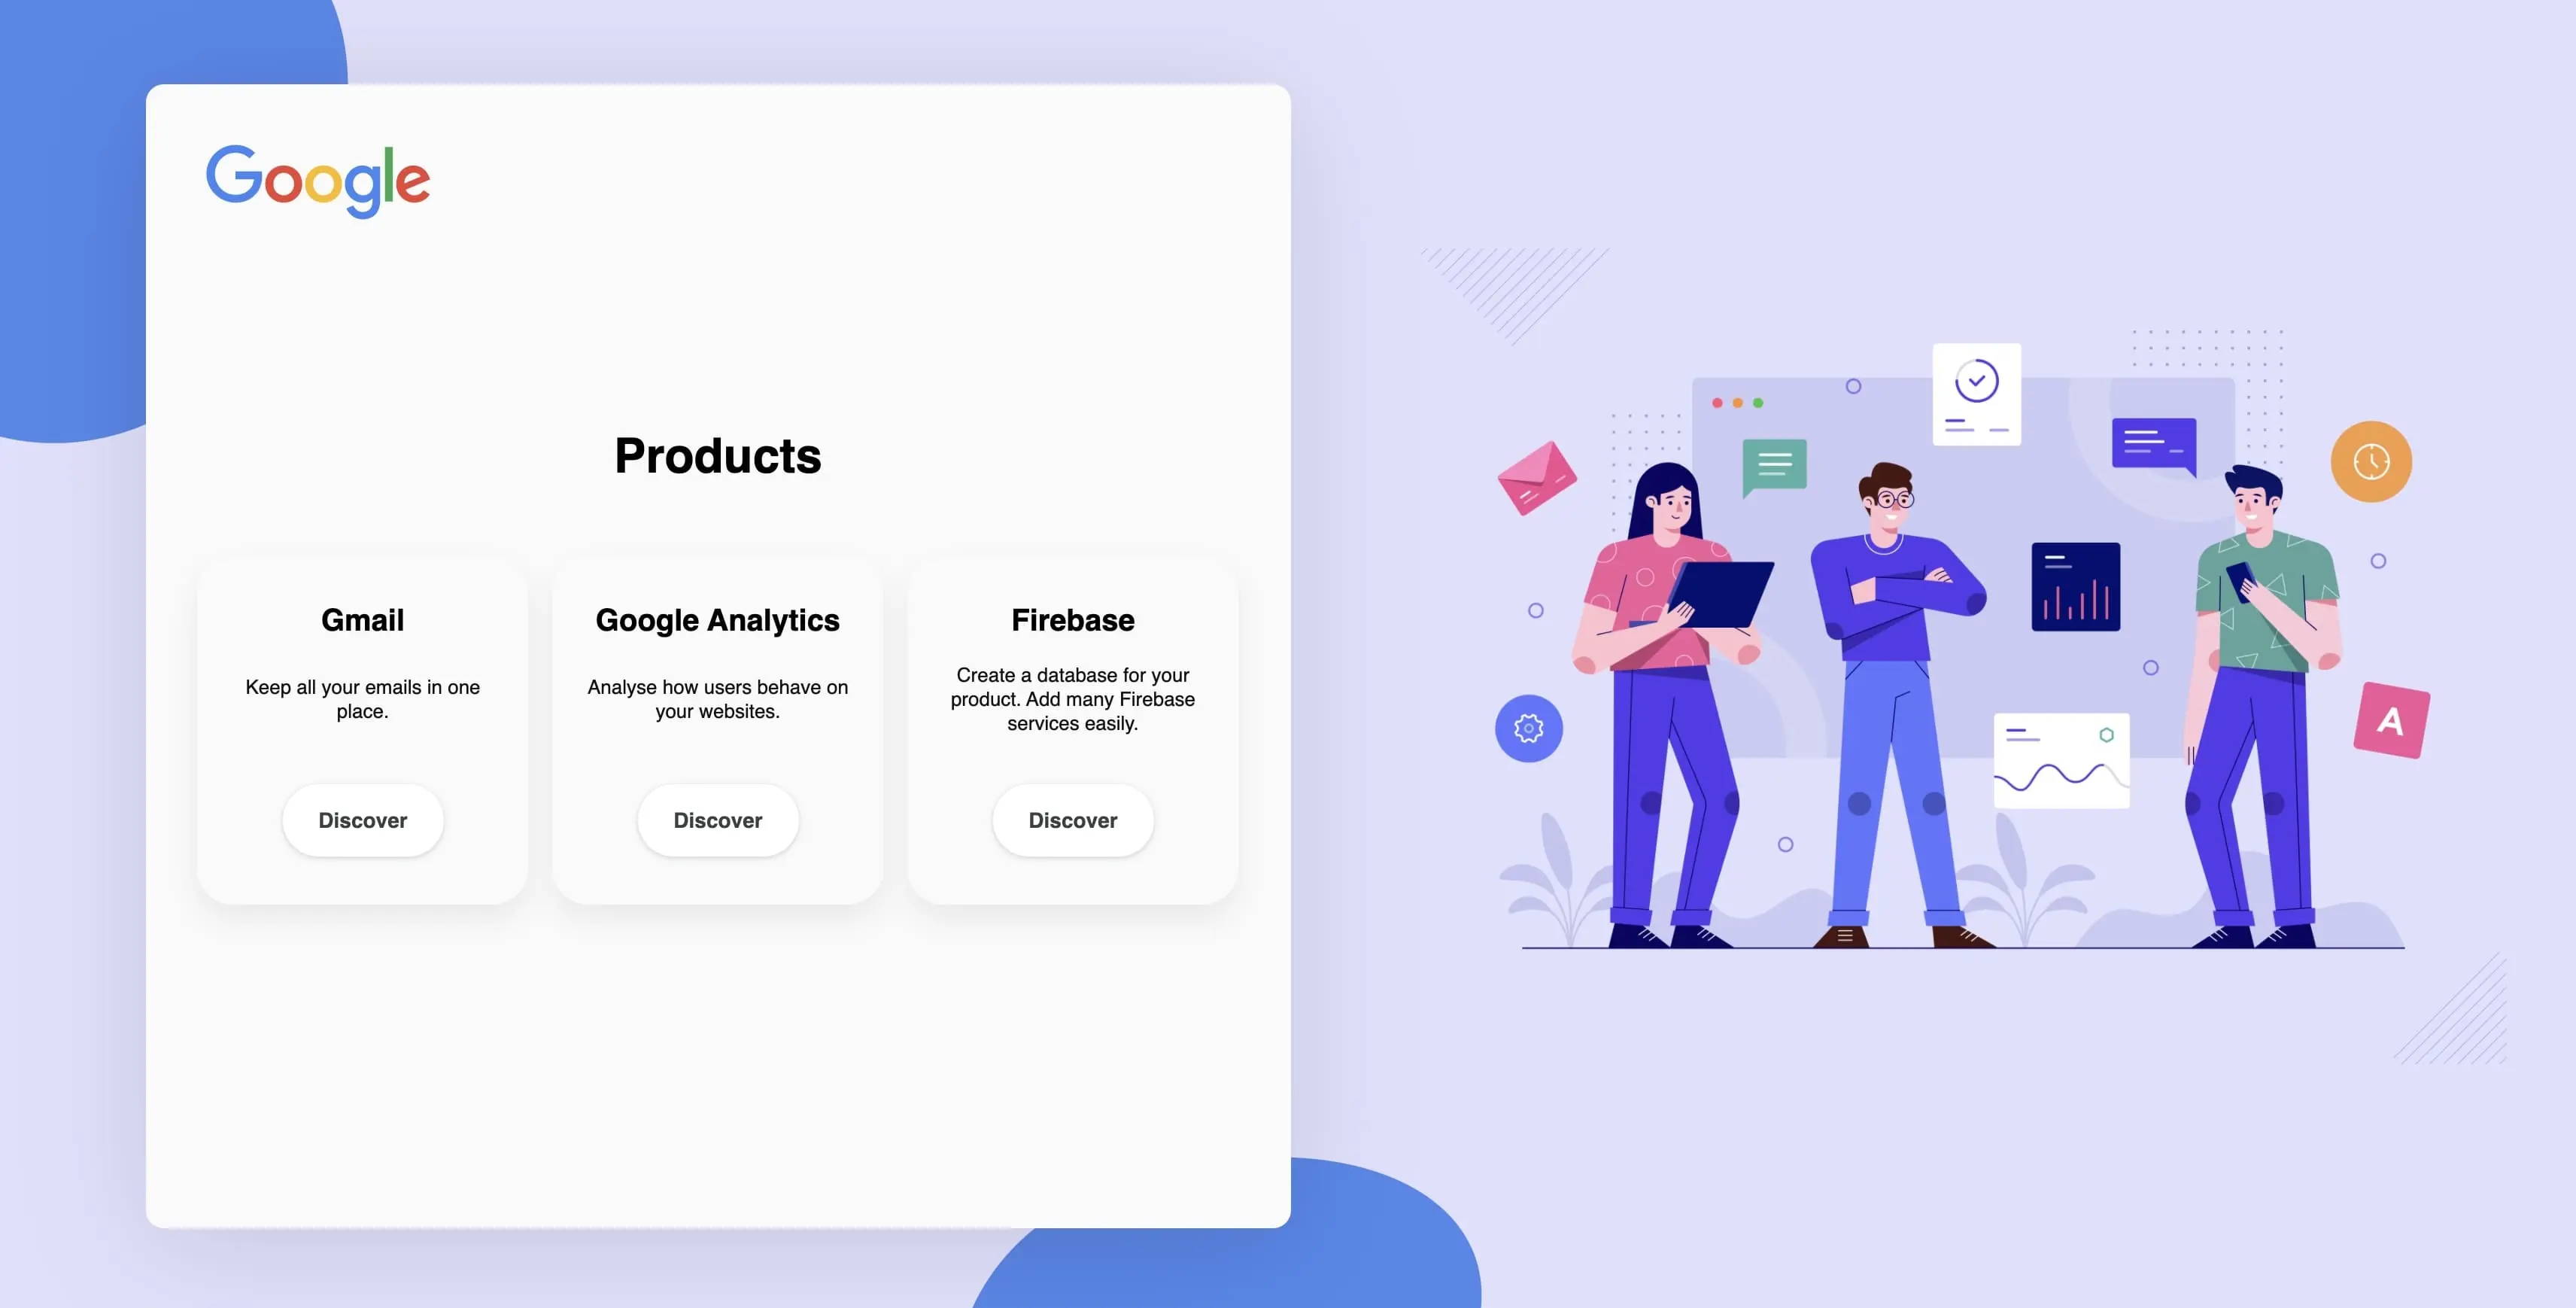
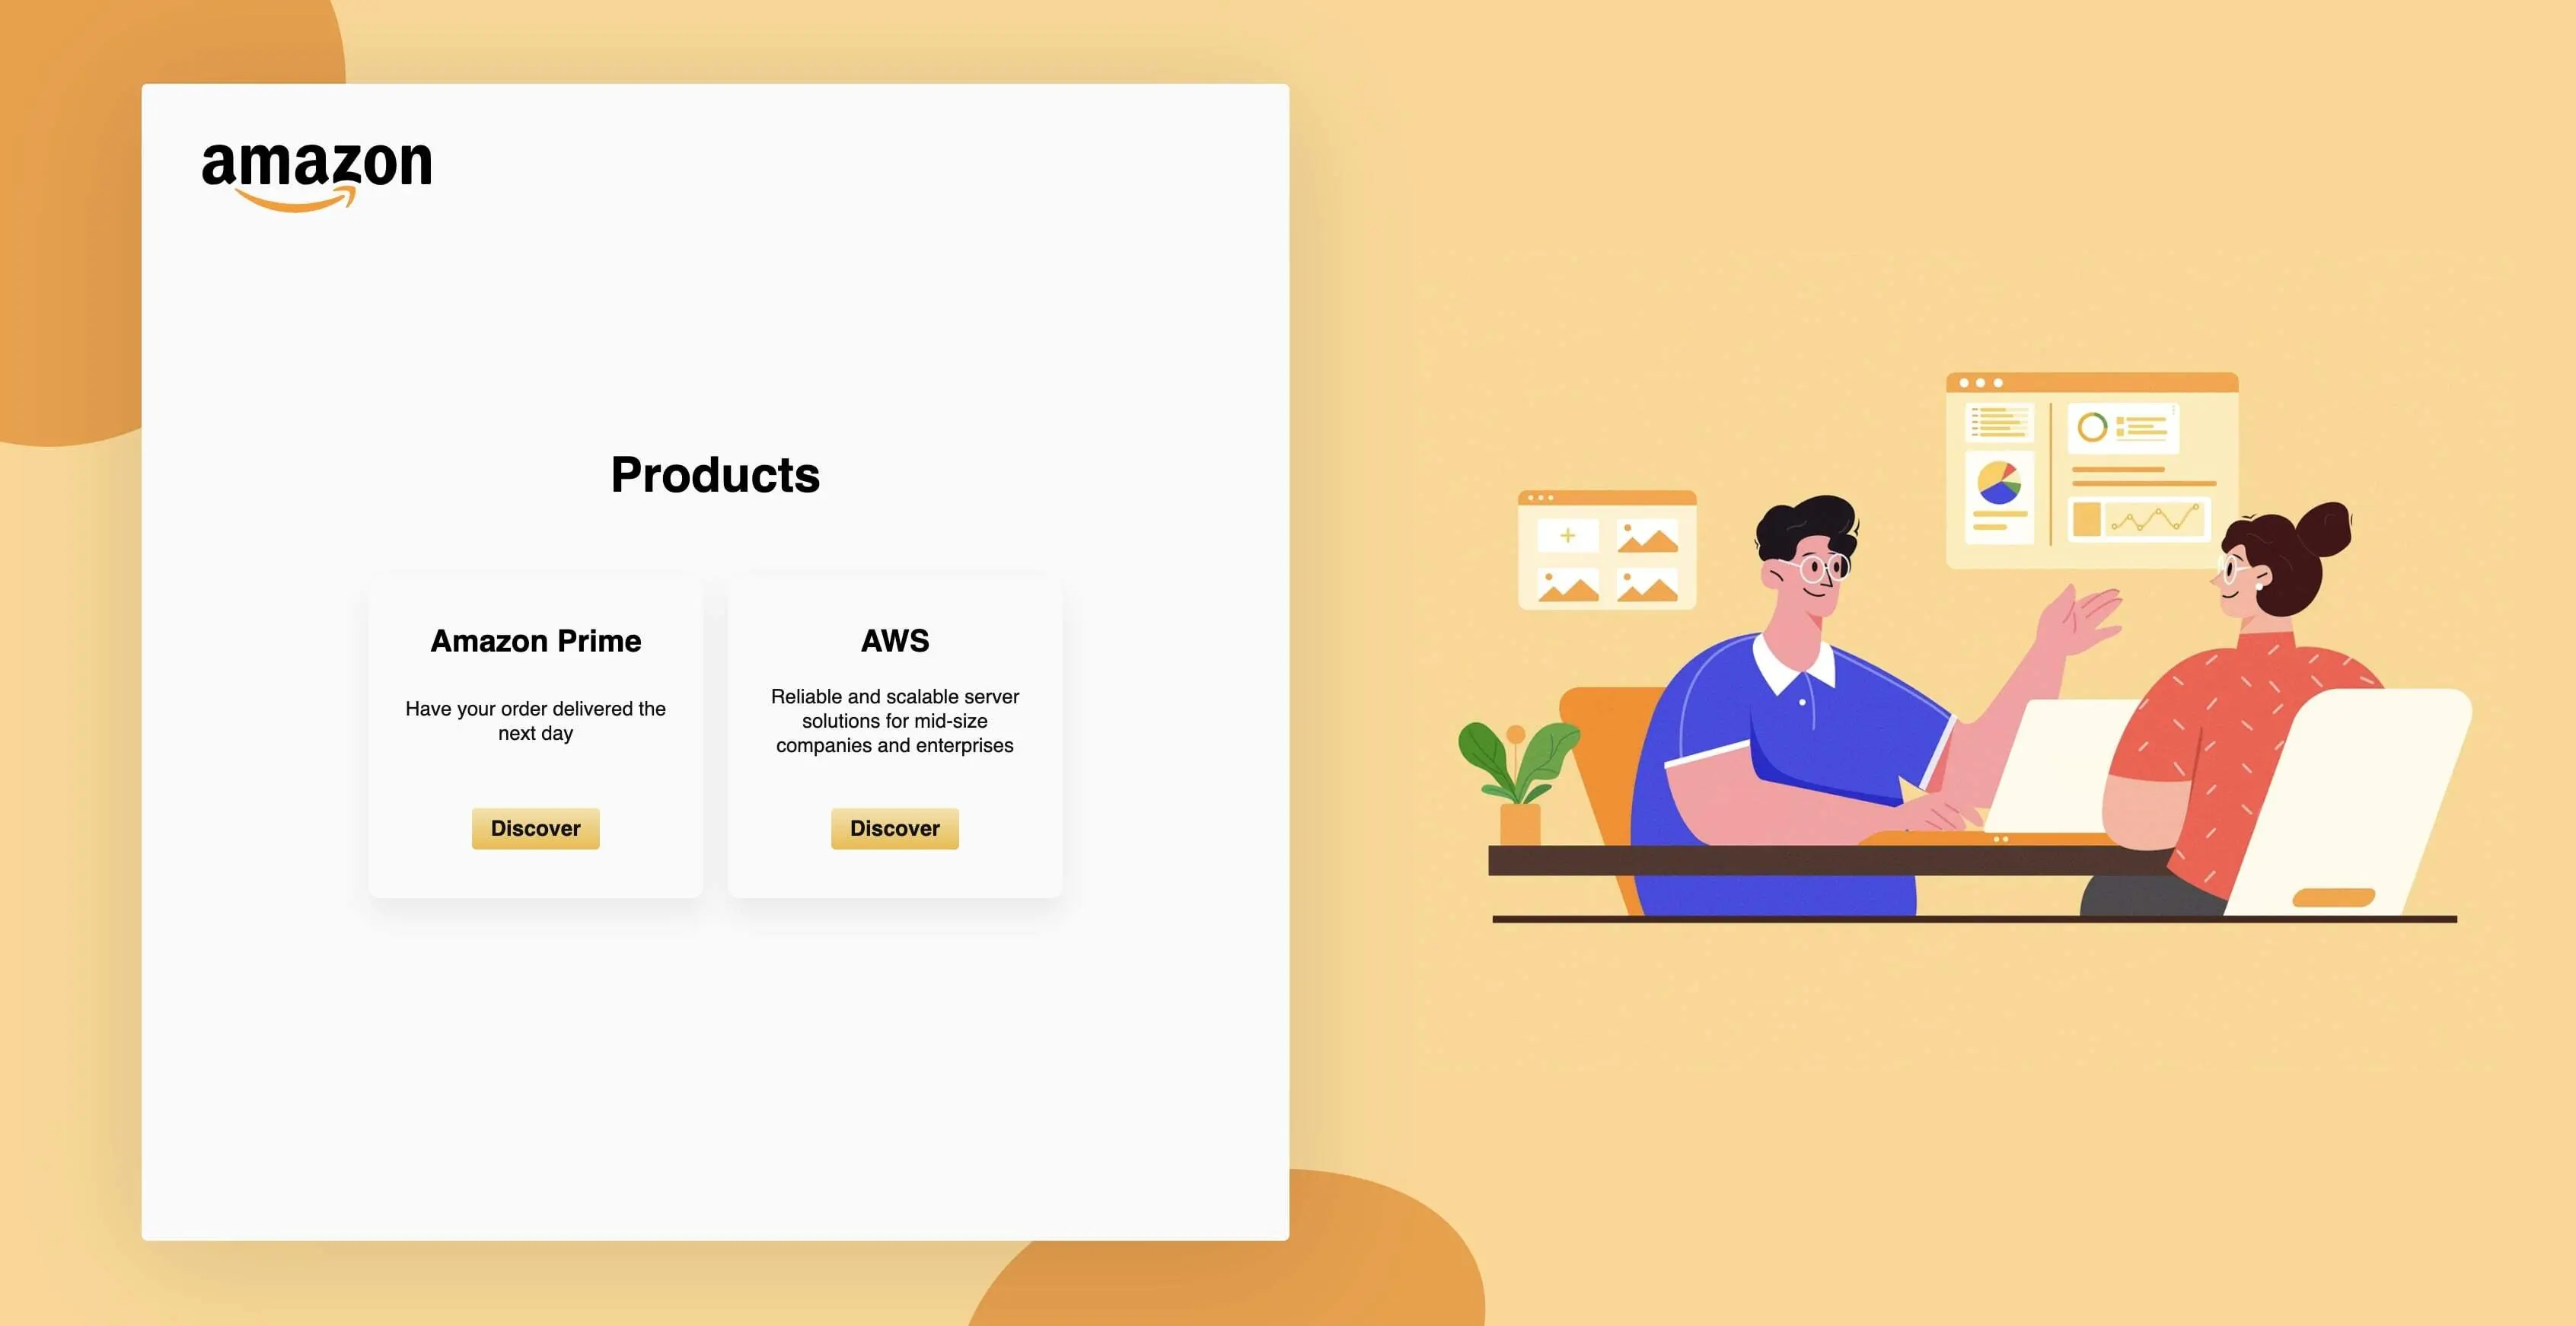
We will build a small app with one view, the appearance of which will change quite drastically when we alter just one line of code. Take a look at the preview and let’s get to work.


What will we need?
This solution is a Vue 3 app and uses Sass as CSS pre-processor.
To fully test and showcase it, we also need to add a bit of JavaScript magic, some product-specific mock data and product-specific images.
The process step-by-step
There are 5 key steps that we need to follow in order to create this solution:
- Setup environment variables
- Create color themes and style variables
- Add images and favicons
- Implement product-specific data in components
- Add files for different clients and check the solution
Setup environment variables
Create .env.local file to put environment variables there. When you go online with it, you will need other files as well and proper configuration of e.g. Netlify.
VUE_APP_DEV_PRODUCT=amazonCreate color themes and style variables
Since we want to give our clients a product with their branding, we need to set up style themes and some logic to handle which theme should be used in which build.
There are 4 steps to achieve this:
1. Add some general, global variables, that will be shared across all products.
// styles/global/_variables.scss

$global-vars: (
  ui-default-measure: 8px,
  ui-default-measure2x: 16px,
  ui-default-measure3x: 24px,
  ui-default-box-shadow: 0 2px 2px 0 rgba(0, 0, 0, 0.3),
)
2. Add specific variables for Amazon
// styles/product-specific/_variables-amazon.scss

$colors: (
  product-primary-light: lighten(#F29D38, 4%),
  product-primary: #F29D38,
  product-primary-dark: darken(#F29D38, 4%),
  product-accent: #c89411,
  product-accent-dark: darken(#c89411, 4%),
  product-text-on-light: #111,
  product-background: #D5DFEC
);

$local-vars: (
  logo: (
    width: 150px
  ),
  button: (
    box-shadow: inset 0 1px 0 0 #fcf3dc,
    background: linear-gradient(to bottom, #f8e3ad, #EEBA37),
    border: 1px solid #c89411 #b0820f #99710d,
    border-radius: 3px,
    padding: 6px 12px,
    color: #111
  )
);

$base-border-radius: 4px;
$global-font-name: 'Assistant';
$font-faces-config: (
  300: 'Light',
  400: 'Regular',
  500: 'Medium',
  600: 'SemiBold',
  700: 'Bold',
);
3. Handle which theme should be used based on env variables
// config/product-specific/styling.js

module.exports = () => {
  switch (process.env.VUE_APP_DEV_PRODUCT) {
    case 'google':
      return '_variables-google';
    case 'amazon':
      return '_variables-amazon';
    case 'facebook':
      return '_variables-facebook';
    default:
      return '_variables-google';
  }
};
4. Import style files in vue.config.js so that they can be used across all components.
// vue.config.js

const getVariablePath = require('./src/config/product-specific/styling');

module.exports = {
  css: {
    loaderOptions: {
      sass: {
        additionalData: `
          @import "@/styles/global/_variables.scss";
          @import "@/styles/product-specific/${getVariablePath()}.scss";
        `
      }
    }
  }
};
Add images and favicons
In assets/product-specific/amazon folder, you should add the images you need. In this example, logo.svg and illustration.png is used. In public/favicon, add Amazon’s favicon.
// index.html
<link rel="icon" href="<%= BASE_URL %>favicon/<%= process.env.VUE_APP_DEV_PRODUCT %>.ico">

// components
const imagePath = computed(() => {
  return require(`./assets/product-specific/${process.env.VUE_APP_DEV_PRODUCT}/illustration.png`);
});

const logoPath = computed(() => {
  return require(`./assets/product-specific/${process.env.VUE_APP_DEV_PRODUCT}/logo.svg`);
});
Get product-specific data
In this example app, we will obtain mock data, directly from the frontend. Below you can see how it’s created and used in App.vue
// config/product-specific/amazon.js

const config = {
  products: [
    {
      id: 1,
      description: 'Have your order delivered the next day',
      title: 'Amazon Prime',
      url: 'https://www.amazon.com/amazonprime'
    },
    {
      id: 2,
      description: 'Reliable and scalable server solutions for mid-size companies and enterprises',
      title: 'AWS',
      url: 'https://aws.amazon.com'
    }
  ]
};

export default config;// config/product-specific/index.js
const config = require(`@/config/product-specific/${process.env.VUE_APP_DEV_PRODUCT}`);
export default config.default;
// App.vue
import productConfig from '@/config/product-specific';
export default defineComponent({
setup() {
const products = computed(() => productConfig.products);
return {
products
};
}
});Add files for different client and check the solution
Now, you can add new themes for each new client. You will need to create a new style file, new config and import new images.
Of course, if it’s not implemented earlier, add the new style to config/product-specific/styling.js.
// styles/product-specific/_facebook-variables.scss

$colors: (
  product-primary-light: lighten(#415993, 4%),
  product-primary: #415993,
  product-primary-dark: darken(#415993, 4%),
  product-accent: #3C3C3C,
  product-accent-dark: darken(#3C3C3C, 4%),
  product-text-on-light: #111,
  product-background: #FFFFFF
);

$local-vars: (
  logo: (
    width: 150px
  ),
  button: (
    box-shadow: none,
    background: #1877F2,
    border: none,
    border-radius: 6px,
    padding: 12px 24px,
    color: white
  )
);

$base-border-radius: 8px;
$global-font-name: 'Roboto';
$font-faces-config: (
  300: 'Light',
  400: 'Regular',
  500: 'Medium',
  600: 'Bold',
  700: 'Black',
);

// config/product-specific/facebook.js

const config = {
  products: [
    {
      id: 1,
      description: 'Add photos and share them with your' +
        ' friends. Become an influencer in your community.',
      title: 'Instagram',
      url: 'https://instagram.com'
    },
    {
      id: 2,
      description: 'Create campaigns and manage ads through' +
        ' one, user-friendly dashboard',
      title: 'Facebook Ads Manager',
      url: 'https://facebook.com/adsmanager'
    }
  ]
};

export default config;

// add assets to assets/product-specific/facebook
Things to watch out for
Changing themes doesn’t happen in hot-reload. You will need to shut down the app and serve it again.
Check build files if you change anything to this solution. You should essentially check if build files don’t contain information about other clients. For example, there shouldn’t be any data or files containing `facebook` in Google build.
When you add a new theme and something doesn’t work for you, check if you added everything (styles, images, mocks).
Conclusion
This specific solution may not be viable if you have hundreds or thousands of clients, but it’s a great basis from which to create someting that will suit your exact needs.
Selling your product to multiple clients in SaaS manner and allowing them to keep their branding gives you great use of economies of scale. You have a technical solution handed to you on a platter, now it’s your turn to find a good business idea to make use of it.
Credits to Aleksander Kraśnicki, JavaScript Developer in 10Clouds who actively participated in creating this solution.