How to Submit Your App to the App Store and Avoid Rejection
11.01.2021 | 6 min read


Some years back now, we wrote our initial guide on how to submit an app to the App Store, and we thought that it was high time to update you with the latest guidance.
If you’ve found yourself here - first of all, congratulations on creating a fully functioning app that you’re ready to release into the world. Exciting times lie ahead!
A word about timings: While the official guidance from the App Stores states that on average, 50% of apps are reviewed in 24 hours and over 90% are reviewed in 48 hours, there are often delays caused by incomplete submissions and other issues with your app. Our aim in this article is twofold: to offer you simple guidance on submission, and to show you some of the common errors to watch out for in order to avoid rejection from the App Store.
Get to grips with the process:
1. Signing up to the Apple Developer Program: First things first. You need to be enrolled in the Apple Developer Program in order to be able to post an app. The membership cost is $99 per year, but it gives you access to a range of features, including:
- Worldwide distribution with no hosting fees: You’re able to reach a billion customers across the world via iPhone, iPad, Mac, Apple Watch, Apple TV, and iMessage. Apple handles all payment processing on your behalf.
- Fast integration of the latest Apple technologies: Apple customers are known for quickly adopting new software releases, and you’ll be able to quickly integrate these into your apps.
- Thorough testing: TestFlight enables you to share your beta builds with up to 100 thousand prospective customers before your launch the all-singing, all-dancing version of your digital product.
- Advanced analytics: App Analytics gives you data on user engagement, marketing campaigns, conversion rates and more, all in an accessible format.
- Preparing your app for submission: It’s worth thoroughly getting to grips with the App store guidelines before submission, as these will help you to get through the app certification process. In the section below, we describe all of the common pitfalls which you should be mindful of in order to ensure a smooth approval process and avoid rejection or delay.
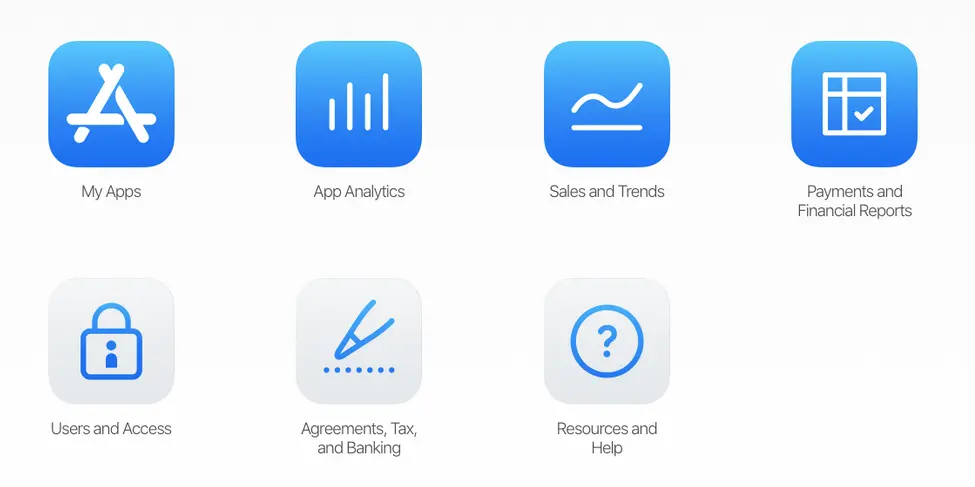
2. Use AppStore Connect to create your AppStore listing
Sign in with the Apple ID you used to enroll in the Apple Developer Program. Then go to the MyApps icon and press ‘+’ to create a new app. Select the platforms that you would like it to appear on and give the app a name. Fill in the details related to the default language, bundle ID and SKU.
The form is fairly straightforward to follow, but use the ‘?’ function if there is something that you’re not sure about.

A few important things to note:
- Once you’ve filled in the above details, they are difficult to chance later, so we would advise being pretty certain about them from the outset.
- Be aware that the bundle ID should match the bundle identifier in your Xcode project Info.plist file
- This is a good opportunity to use the right keywords to give your app the best chance of being discovered.
- The SKU will not be visible to users, so don’t be too concerned about the way that it’s formatted.
Create an App Privacy Policy: Note that the AppStore requires you to have an AppPrivacy Policy, so make sure that you have this ready in advance of submission. There are various templates such as this one which can help you out if you’ve never written one before. This will need to go on a public url as well as your app - the usual place where you might feature a link to it is a website footer.
Decide on your pricing: You will then be able to make a decision about where your app will be free or paid for, and if the latter - what your price plan will be.
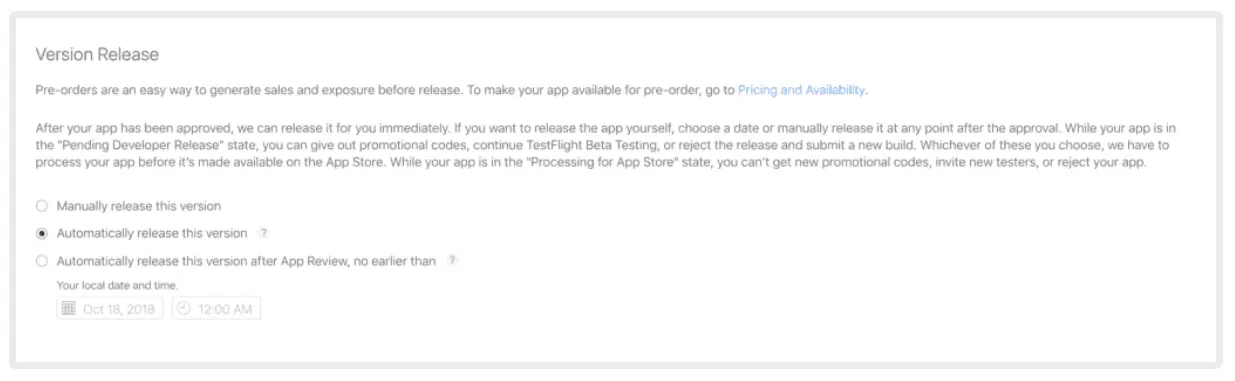
Decide on the method of release: Finally, you’ll be able to decide on the method of your apps release from the three options of manual (from AppStore Connect), immediate (following certification) and On a date (scheduled following certification).

3. Upload your screenshots
Your app screenshots should be in .jpg or .png formats. Sizing should not be too much of a concern, as you can upload the screenshots for one device and then use them for all of the remaining ones.
Note that if your app supports Dark Mode, it is worth adding at least one screen which shows this.
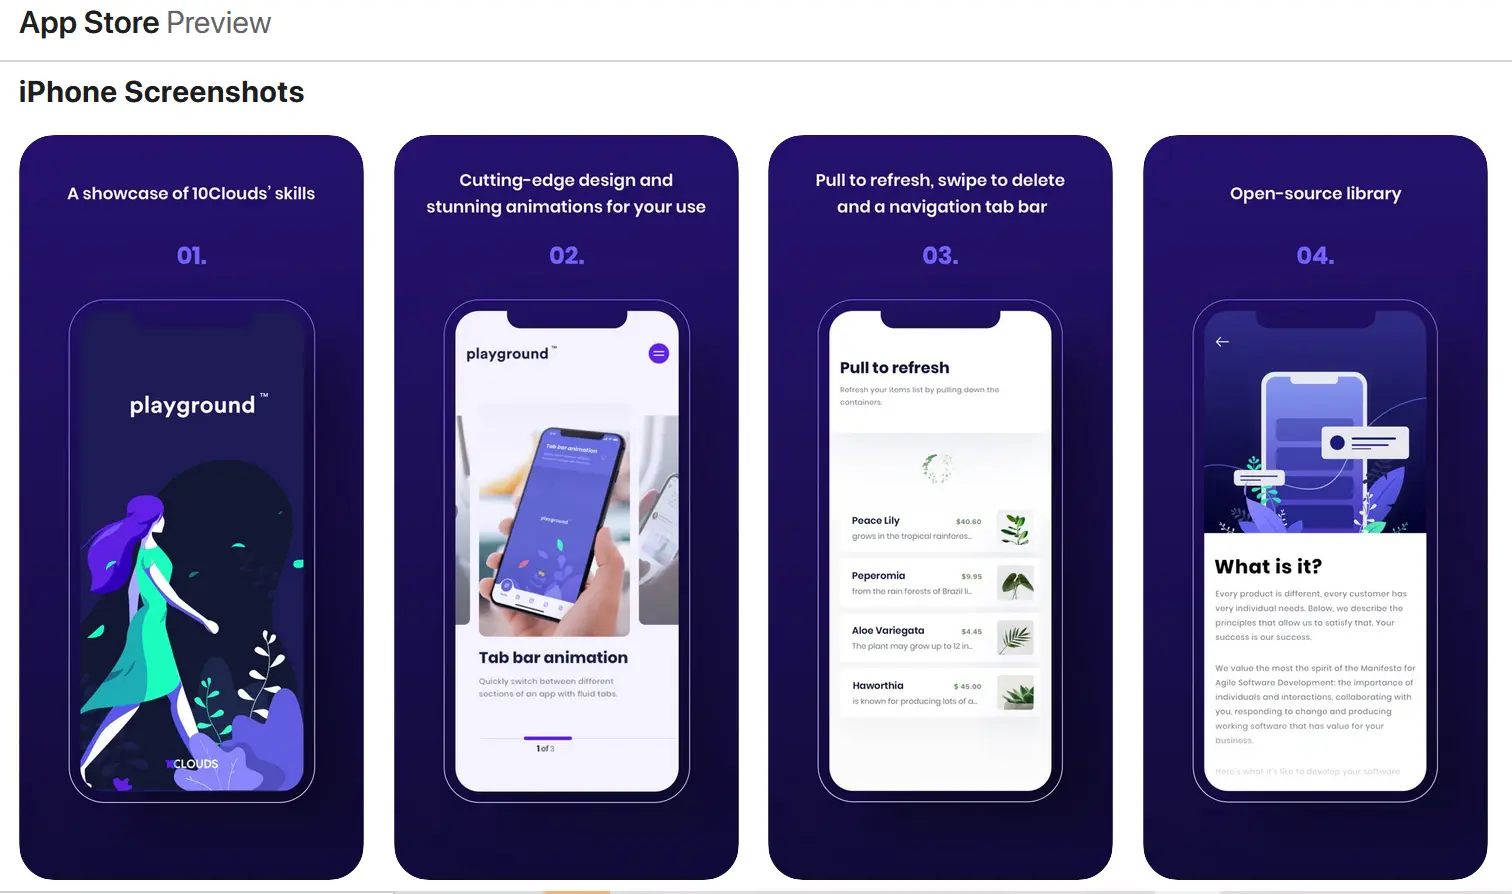
Another point to be mindful of is that your screenshots should be taken straight from the real device or simulator because your design files will often be different from the final look. Take a look at our two examples below to see what we mean:
- SmogDog - screenshots taken straight from the device.
- Playground - screenshots are essentially frames prepared by designers.

Once you’ve saved your screenshots, you’ll be asked to enter your app’s description, keywords, support URL, and marketing URL. Once again, this is a great opportunity to optimize your app for search.
4. Upload your app to the AppStore
If you haven’t already, set up your signing and team information in Xcode. Your app should be set to 1.0.0 if you are publishing a new app. Xcode previously used to be more complicated, but the latest version of it, Xcode11, has a radically simplified process. Starting April 2021, all iOS and iPadOS apps submitted to the App Store must be built with Xcode 12 and the iOS 14 SDK.
5. Submit your app for review
Once you’ve completed the above, you can go straight to the “Build” section in your app’s App Store Connect record.
Go to ‘Select a Build before you submit your app’ and then choose the build that you previously uploaded through Xcode. Finally click ‘Done’, ‘Save’ and ‘Submit for Review’. Be aware that before submission you’ll also have to answer questions relating to Export Compliance, Content Rights, and Advertising Identifier.
And that’s it! What do you do now?
Well it�’s a case of waiting for the review process to be completed. You can check in on the status of your app in AppStore Connect, in the ‘Activity Section’.
With any degree of luck, this will be a smooth process for you! But if your app does get rejected, don’t worry - it’s just a case of reviewing the guidelines submitted by Apple and ensuring that you make all the necessary adjustments. Below, I’ve included some additional points to watch out for to give your app a better chance of being accepted the first time around.
Avoiding the most common app rejections
Bugs - It goes without saying that you should thoroughly test your app on all devices before launching it on the app store. If you don’t have your own software testing team, you can, at the very least, conduct your testing on TestFlight (as mentioned above). Bugs and crashes are one of the prime reasons for why apps get rejected.
Wrong screenshots - App screenshots need to be an accurate reflection of your app’s functionality. If you’re using overlay images or text to highlight features, make sure that you’re doing so in a sensible way and that you’re not obscuring some of the most relevant features.
Insufficient information - While it might be a lengthy process, its important to include as many details as possible about your app at the submission stage. This includes not only its general functionality, but also they way in which extra features work. If some features require sign-in, you must include the details of a demo account, so that these can be thoroughly tested out.
Inadequate user interface - Apple places a huge value on a clean and highly functional user interface, so if yours is complex or cluttered, this is grounds for it being rejected. If this is something that you’re concerned about, you might find the guidance on this page useful.
Privacy - According to Apple’s guidelines, ‘All apps must include a link to their privacy policy in the App Store Connect metadata field and within the app in an easily accessible manner.’ Note that there are two kinds of links, which Apple requires all apps to have.
1. A direct link to ‘Support’ and ‘Contact details’
2. A link to the ‘Privacy Policy Page’
Payment systems - Note that if your app is one that is paid for - i.e. the user has to make payment to unlock functionality, all of these transactions need to be made through the Apple purchasing system for security purposes. If you have an existing website which already uses different payment systems, you’ll need to be mindful of this when you’re converting it into an app.
Permission to use data - In the age of GDPR, data is of paramount importance. That is why Apple wants you to fully describe how you will use any user data. Also, according to instructions from the AppStore: “If your app’s code references one or more APIs that access sensitive user data, the app’s Info.plist file should contain a $!{infoPlistKey} key with a user-facing purpose string explaining clearly and completely why your app needs the data.”
In conclusion
We hope that you’ve found the above summary useful and that it’s helped to make your app submission process straightforward and smooth. We wish you all the best on your new digital project journey! May this be the start of something truly great!